MDQC 0.4: What’s New? How-to #3: Quick Guide to Exporting MediaInfo Files via GUI & CLI
October 12, 2018
This month, we released the newest version of our free tool MDQC, which allows users to easily perform metadata quality control. Using ExifTool and MediaInfo, MDQC compares embedded metadata of batches of media files to the metadata found in a reference file defined by the user. The creation of a series of rules allows a user to specify which fields they wish to QC and which files in a given folder the application should scan. MDQC is available for both Mac and Windows users.
In this version, we have incorporated new features that allow more control and independence over the filtering and scanning process. We have published a series of reviews of MDQC’s newest features on the blog section of our website. If you are new to MDQC, we recommend you to read the MDQC User Guide first so you are familiar with the application’s basic functionalities.
One of the new functionalities allows users to use MediaInfo files as surrogates for media files. MediaInfo is an open source tool that displays technical metadata for media files. This new feature is useful in any scenario in which security or bandwidth are impediments to performing quality control on the media files themselves. Since MediaInfo files are text based, these can be easily sent over email or shared in online storage applications, without the hassle of moving around large media files.
In order to use the new MediaInfo feature, you will need to export MediaInfo files for the files you wish to reference and/or for those that will replace your media files in the scanning process. In this post we will guide you through the creation of MediaInfo files for both Mac and Windows platforms. You can download the latest versions of MediaInfo here. More details about this new feature are also available in our previous post.
MediaInfo Online
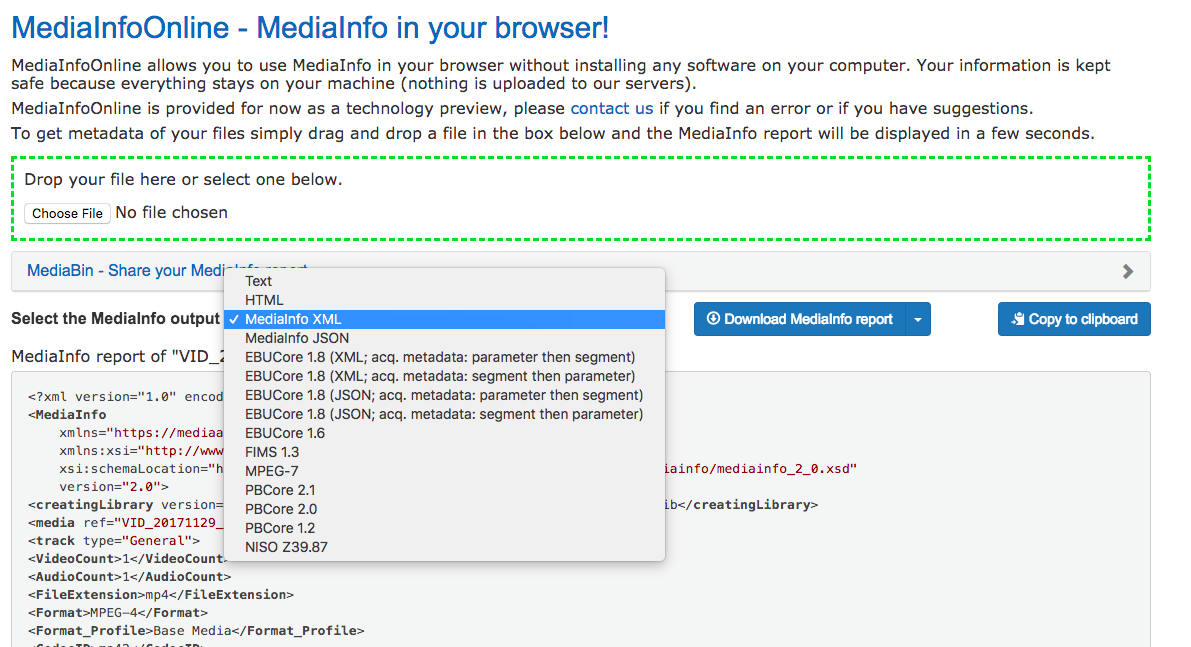
It is possible to generate MediaInfo files online here: https://mediaarea.net/MediaInfoOnline
Simply drag and drop the file you wish to create a MediaInfo export for. You can change the output format and download a report directly from the website. However, as with the desktop app, it is only possible to generate one file at a time.
For Mac Users
It is currently not possible to generate individual MediaInfo files automatically for a group of files using the GUI (Graphic User Interface) version of MDQC. However, you can still generate single files to use as the reference, since only one is required.
MediaInfo GUI
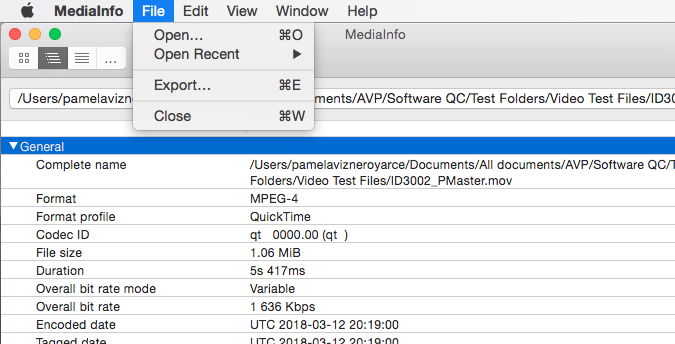
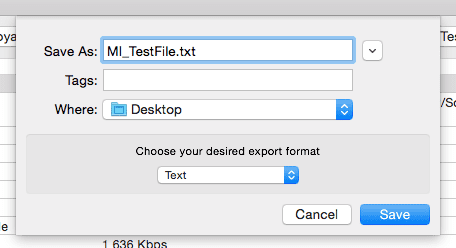
To generate MediaInfo files using the GUI version of MediaInfo, you must open the media files with MediaInfo and select Export from the File menu. Enter file name (in this case MI_TestFile.txt), select the directory to save, select Text or Mediainfo XML as the output format and click Save.
Additionally, when opening a file in MediaInfo, you can select a folder to generate MediaInfo outputs for many files. From the top dropdown you can select which media file you want to view.
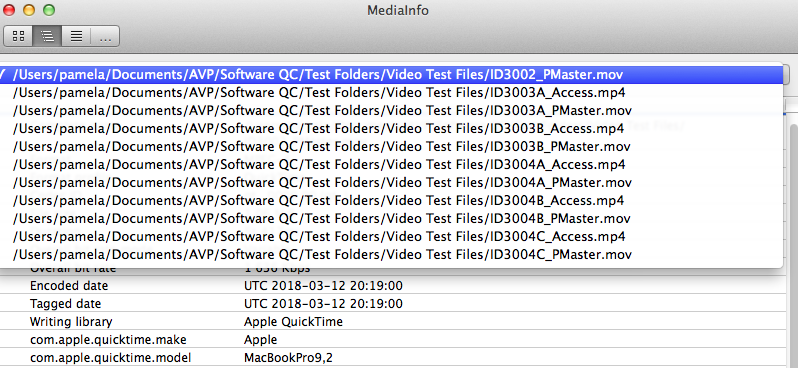
However, a single export of this will generate one single text file with all the outputs in it, which will not work with MDQC, since the application requires one MediaInfo file per media file. Therefore, if you wish to generate MediaInfo files in batches to use as surrogates for scanning, the GUI version will not suffice. This is when the Command Line Interface (CLI) version comes in handy.
MediaInfo CLI
As mentioned above, to use the MediaInfo feature of MDQC, it is necessary to have a single MediaInfo surrogate for each file to be scanned. The GUI versions of MediaInfo, unfortunately, only allow the creation of one file at a time. The CLI version, allows more flexibility for the creation of MediaInfo files, as it can be used in a custom script to automatically generate all needed surrogates at once.
In this post, we provide a sample script that will generate a single text MediaInfo file for all media files stored in a given folder, creating a separate folder that contains all MediaInfo files. In order to run this script, you will need some familiarity with the command-line. For some users the command-line can be overwhelming, since it requires some manual coding. We hope this step-by-step tutorial is clear enough and easy to follow for users with all levels of command-line expertise.
First, you can download our custom script here (written by Bert Lyons)
Then, open a Terminal window on your computer and navigate to the directory where the script is stored. To do so, type:
cd [full file path of the directory where the script is located]
Note: you can drag and drop in the Terminal window the folder where the script is stored to automatically populate the file path.
Now you must make the script executable typing:
chmod u+x mi-files.sh
Now you are ready to run the script. To do so, simply type:
./mi-files.sh [full file path of the directory that contains the media to be scanned]

After running the script, you should see in the same folder where the files are located, a new folder called MI-Files containing all text file exports of MediaInfo. You can then point MDQC directly to this folder, or share the files with the person performing metadata QC.
For Windows Users
The windows version of MediaInfo allows the creation of sidecar XML files. These are individual text files for each media item that are created in the same folder where the actual files live. These sidecar files can be used in MDQC in place of media files.
To generate sidecar files, open MediaInfo and select File>Open>Folder:

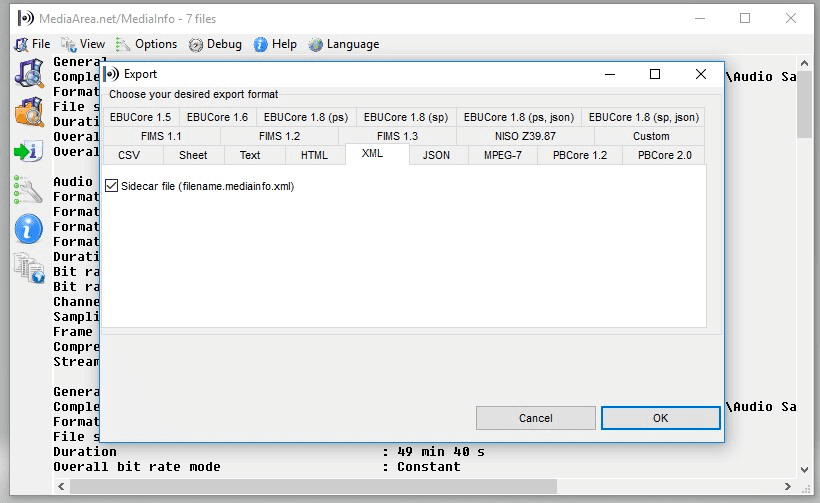
Then, select File>Export:

In the window that appears, select XML as the export format and check the box Sidecar file.
An XML file will be added in the same location as the media file. You can now send these XML files to the person performing QC with MDQC, instead of sending large media files.
Want to know more about MDQC’s new features? Check our previous review Narrowing scanning filters using base filenames in MDQC.